Distressed Wood Frame, with Flowers Decor

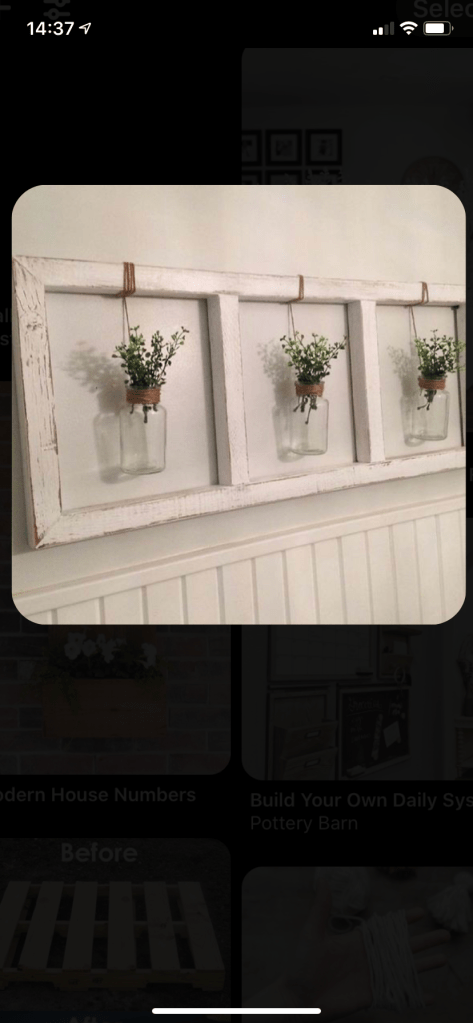
Have an old frame laying around? Don’t throw it away! Here is a simple trick to restore a new beautiful piece!

Materials needed: Old frame, twine, small jars, fake babies breath flowers, white paint, sand paper.

Ready… set…. go!

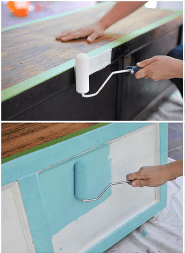
Step 1: Sand off any old paint, or blemishes on your old frame

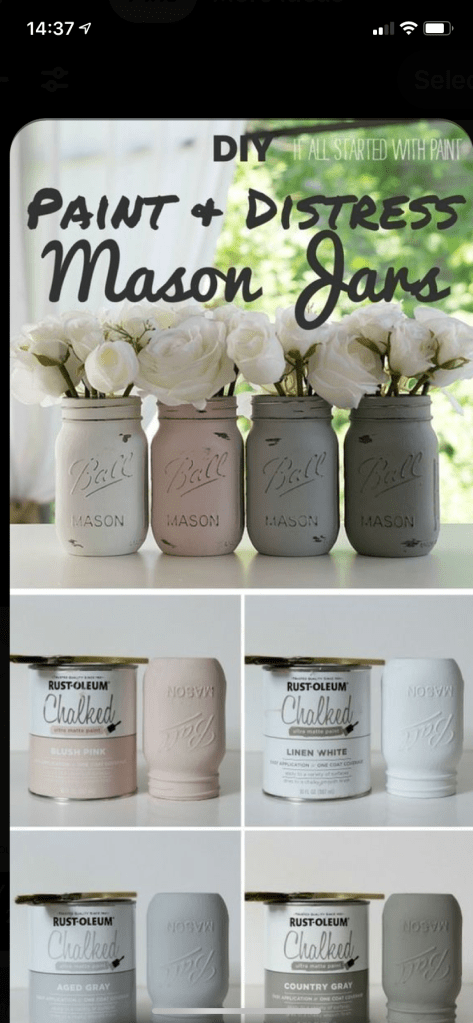
Step 2: Paint one layer of white paint onto frame. Let it dry for 1-2 hours.

Step 3: After the paint is dry, take sand paper and scuff/sand off some white paint randomly around your frame. This will create the illusion that the frame is old

Step 4: Set the frame aside, take the twine and wrap around the top of the jars. 4-5 layers up will do for your jars. Tie off a little knot, DO NOT CUT.

Step 5: With twine still attached to your jar, wrap around the top of frame and let your jar hang to your desired length. Tie it off and cut the twine. Repeat with the jars left over.

Step 6: Now for the perfect touch, place the babies breath flowers into your jars. Beautiful!

Look at that! You are getting good at this! Come back next week one more time for my last DIY piece!

Classic Mason Jar Recreation!

Do you like the old rustic farm style look?

Here is how you do it!

Materials needed: Chalk paint, paint brush, three mason jars, matte mod podge, fake flowers, sand paper.

Step 1: Wash and dry mason jars, put on one coat of chalk paint (apply two if needed after first layer is dry). Let dry for 1-2 hours

Step 2: apply a thin layer of matte mod podge after all paint is dry. Let mod podge dry for 1 hour.

Step 3: To create a distressed rustic look, rub sand paper around random spots on mason jar.

Step 4: Place any kind/color of flowers in jars.

Enjoy your new lively display!

Wooden Address outdoor Decor

Hello there! Its Alicia again! Are you ready for Simple, Easy, and Stylish?

Step one: Materials needed – oak wood, light brown wood stain, black paint, metal numbers, small 1inch screws, fake grass/flowers, glue, clamps (if accessible) and sand paper.

Step two: prep your boards. Create a nice finish by sanding down your wood planks.

Step three: Glue the pieces of wood together to create the size you desire. For a clean finish, clamp your pieces firmly together. Glue your small decorative flower box together as well.

Step four: Once the glue is dry, stain your wood to your desired color. While doing that paint the small flower box black, let it dry for 2 hours.

Step five: on a 45 degree angle screw the flower box into the bottom of your wood platform.

Step six: With an extra screw evenly create small holes for the numbers to slip into. To do this you must drill the screw into the wood and back out. Once created place glue in the small holes. This will hold the medal numbers in place.

After everything is done, you have created a beautiful way to display your address numbers.

Stay toned for my next DIY project! Talk to you soon!

Need a Space For Your Books?

Easy solution! Make your own book nook!

Tools needed: Buy or find a wood palette. Regular/electric saw. Measuring tape. 2×4 wood plank. 1 inch nails. Electric drill. Sander/sand paper. Wood Stain/Paint.

Step 1: With a regular/electric saw cut palette into three sections as show in the picture.

Step 2: Measure and cut 2×4 to be placed within the inside of the palette for books to rest secure on. Drill 1-inch nails angled into the original wood palette. This will secure the board into place.

Step 3: For a clean finish, sand (80 grit) down the palette to your preference. Once sanded, brush off any access wood dust.

Step 4: Stain/Paint the wood to the color you desire.

I hope you enjoyed today’s tutorial, come back soon to learn more DIY flips!

Out With The Old In With The New

Today I will be showing you how to make an old run down cedar chest into a new fashionable table!

STEP 1 – Sand and Tape
STEP 2 – Prime and Paint
STEP 3 – Personalize and Decorate

In step 1 you will need to sand down (fine sand paper-220 grit) the original chest that is available. Wipe down the entire chest for any loose particles. After the chest is cleaned, tape off the top piece to keep the original wood. If needed, paint the dark wood (on the sides) with white to give it a bright setting. Make sure the blue painters tape is on the very corner of where the side and top meet.

After completing step 1 and letting it dry, it is time to paint on your preferred color. Make sure your surface is clean. For bright and consistent color apply 2 coats. Let it dry for 2-3 hours.

Step 3 includes adding personal design. For this particular chest, we added metal pieces from a classic metal cabinet and hot glued them to the front panel. For other pieces Menards and Lowes offers a variety of cabinet handles and knobs.

Once the final touches are complete, its time to design and place! Adding plants, organizational pieces for keys, pens, etc. give the table a nice touch to your home.

I hope you enjoyed! Stay tuned for the next flip which will include a wood palette recreation!

The More We Can Relate The Better The Movie

“That last night at home, you think about how you could of been a better dad, a better husband, that bedtime story you should of read, or that anniversary you forgot. You don’t expect your family to understand what you’re doing. You just hope they understand you’re doing it for them, and when you get home you hope you can pick-up right where you left off.” Chief Dave

This quote is from the movie “Act of Valor”. In this scene, a Navy SEAL team is sitting around a camp fire with their families on the last night before their next mission. And Chief Dave, leader in the platoon, is giving a heart warming last words before they take off into dangerous territory.

This captures all of the Sticky Principles: Simple, Unexpected, Concrete, Credible, Emotion, & Story.

I picked this movie because when I watched it over the summer I connected with it to a much deeper level than most. His words ponder in my mind every now and then. My boyfriend, Ethan, is in the United States Navy and he has served for nearly a year and a half now. When Chief Dave talked about the family not understanding, it hit home because I feel like I do not understand when Ethan has to leave sometimes either, but I know its for a good reason.